People App Overview
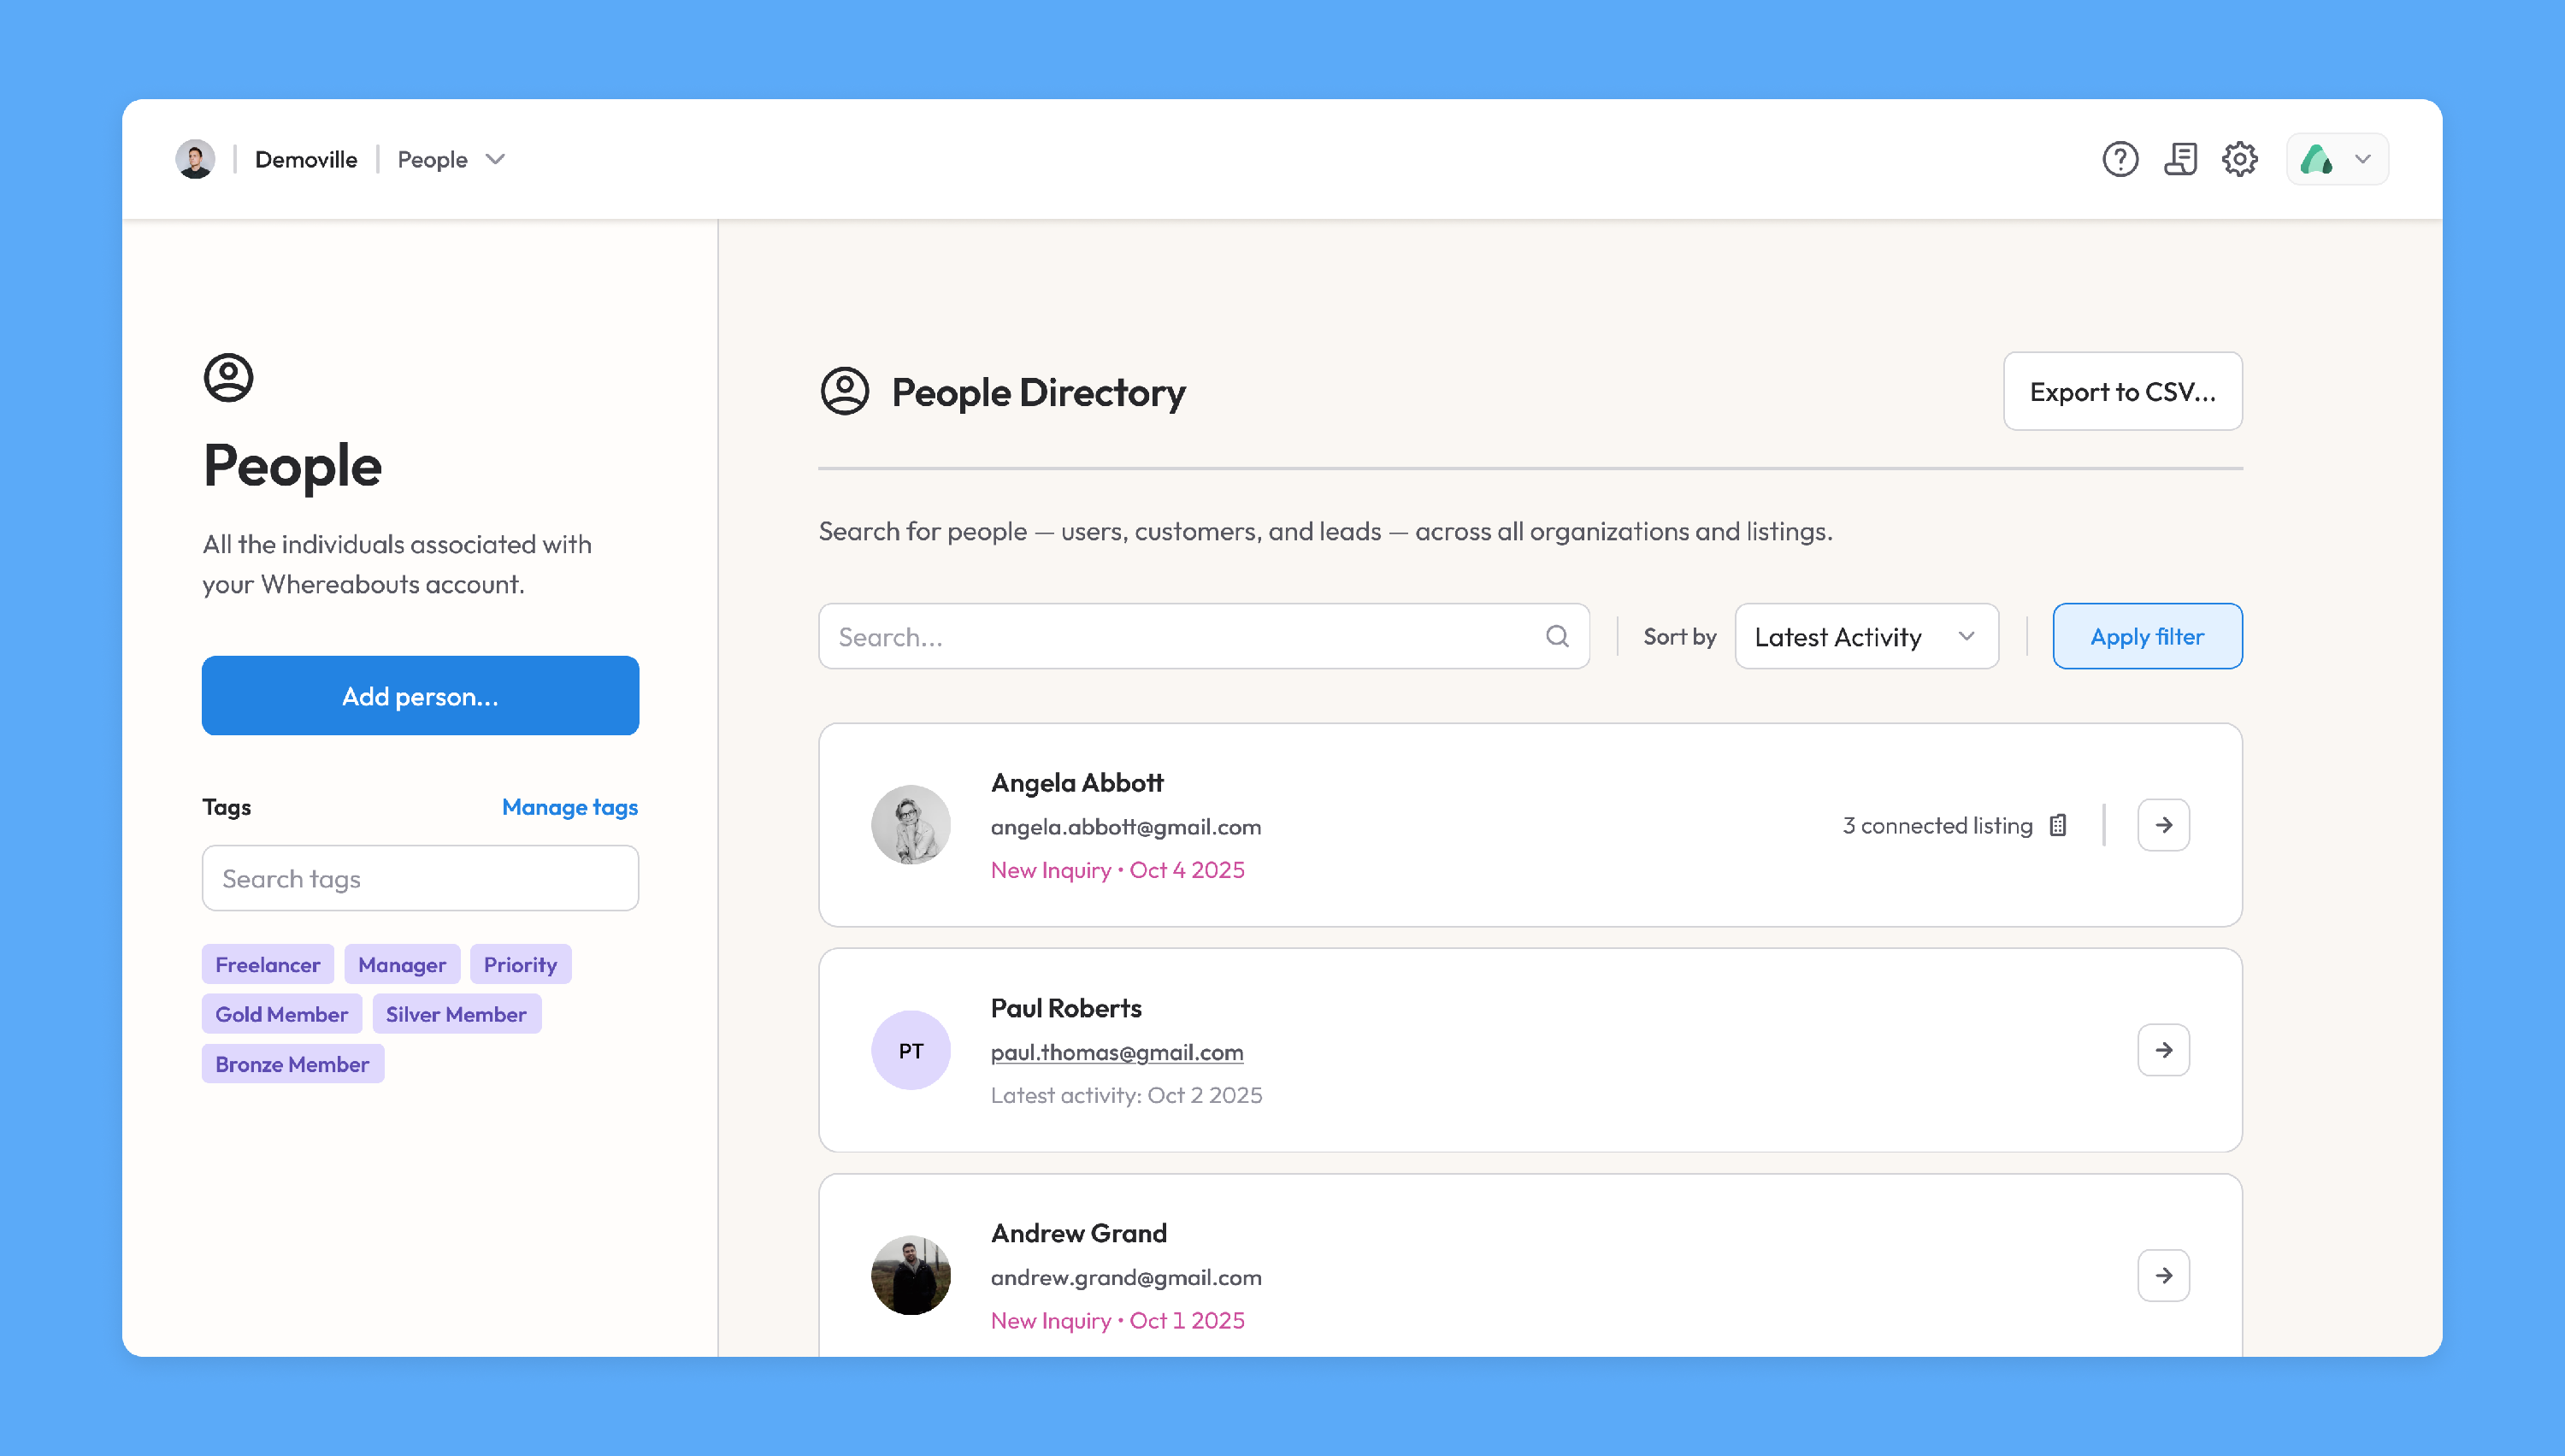
The People app, available for organizations, keeps track of all the various contacts associated with your Whereabouts account. Here, you can...
- Quickly search through your list of contacts
- Create, manage, and apply custom tags to contacts
- Build advanced queries to identify specific segments of contacts
- Store detailed info for each individual contact
We'll look at these features in detail below.
Adding a Person
To add a new person to your Whereabouts account, simply click the button in the left menu. This will open the Add Person modal:
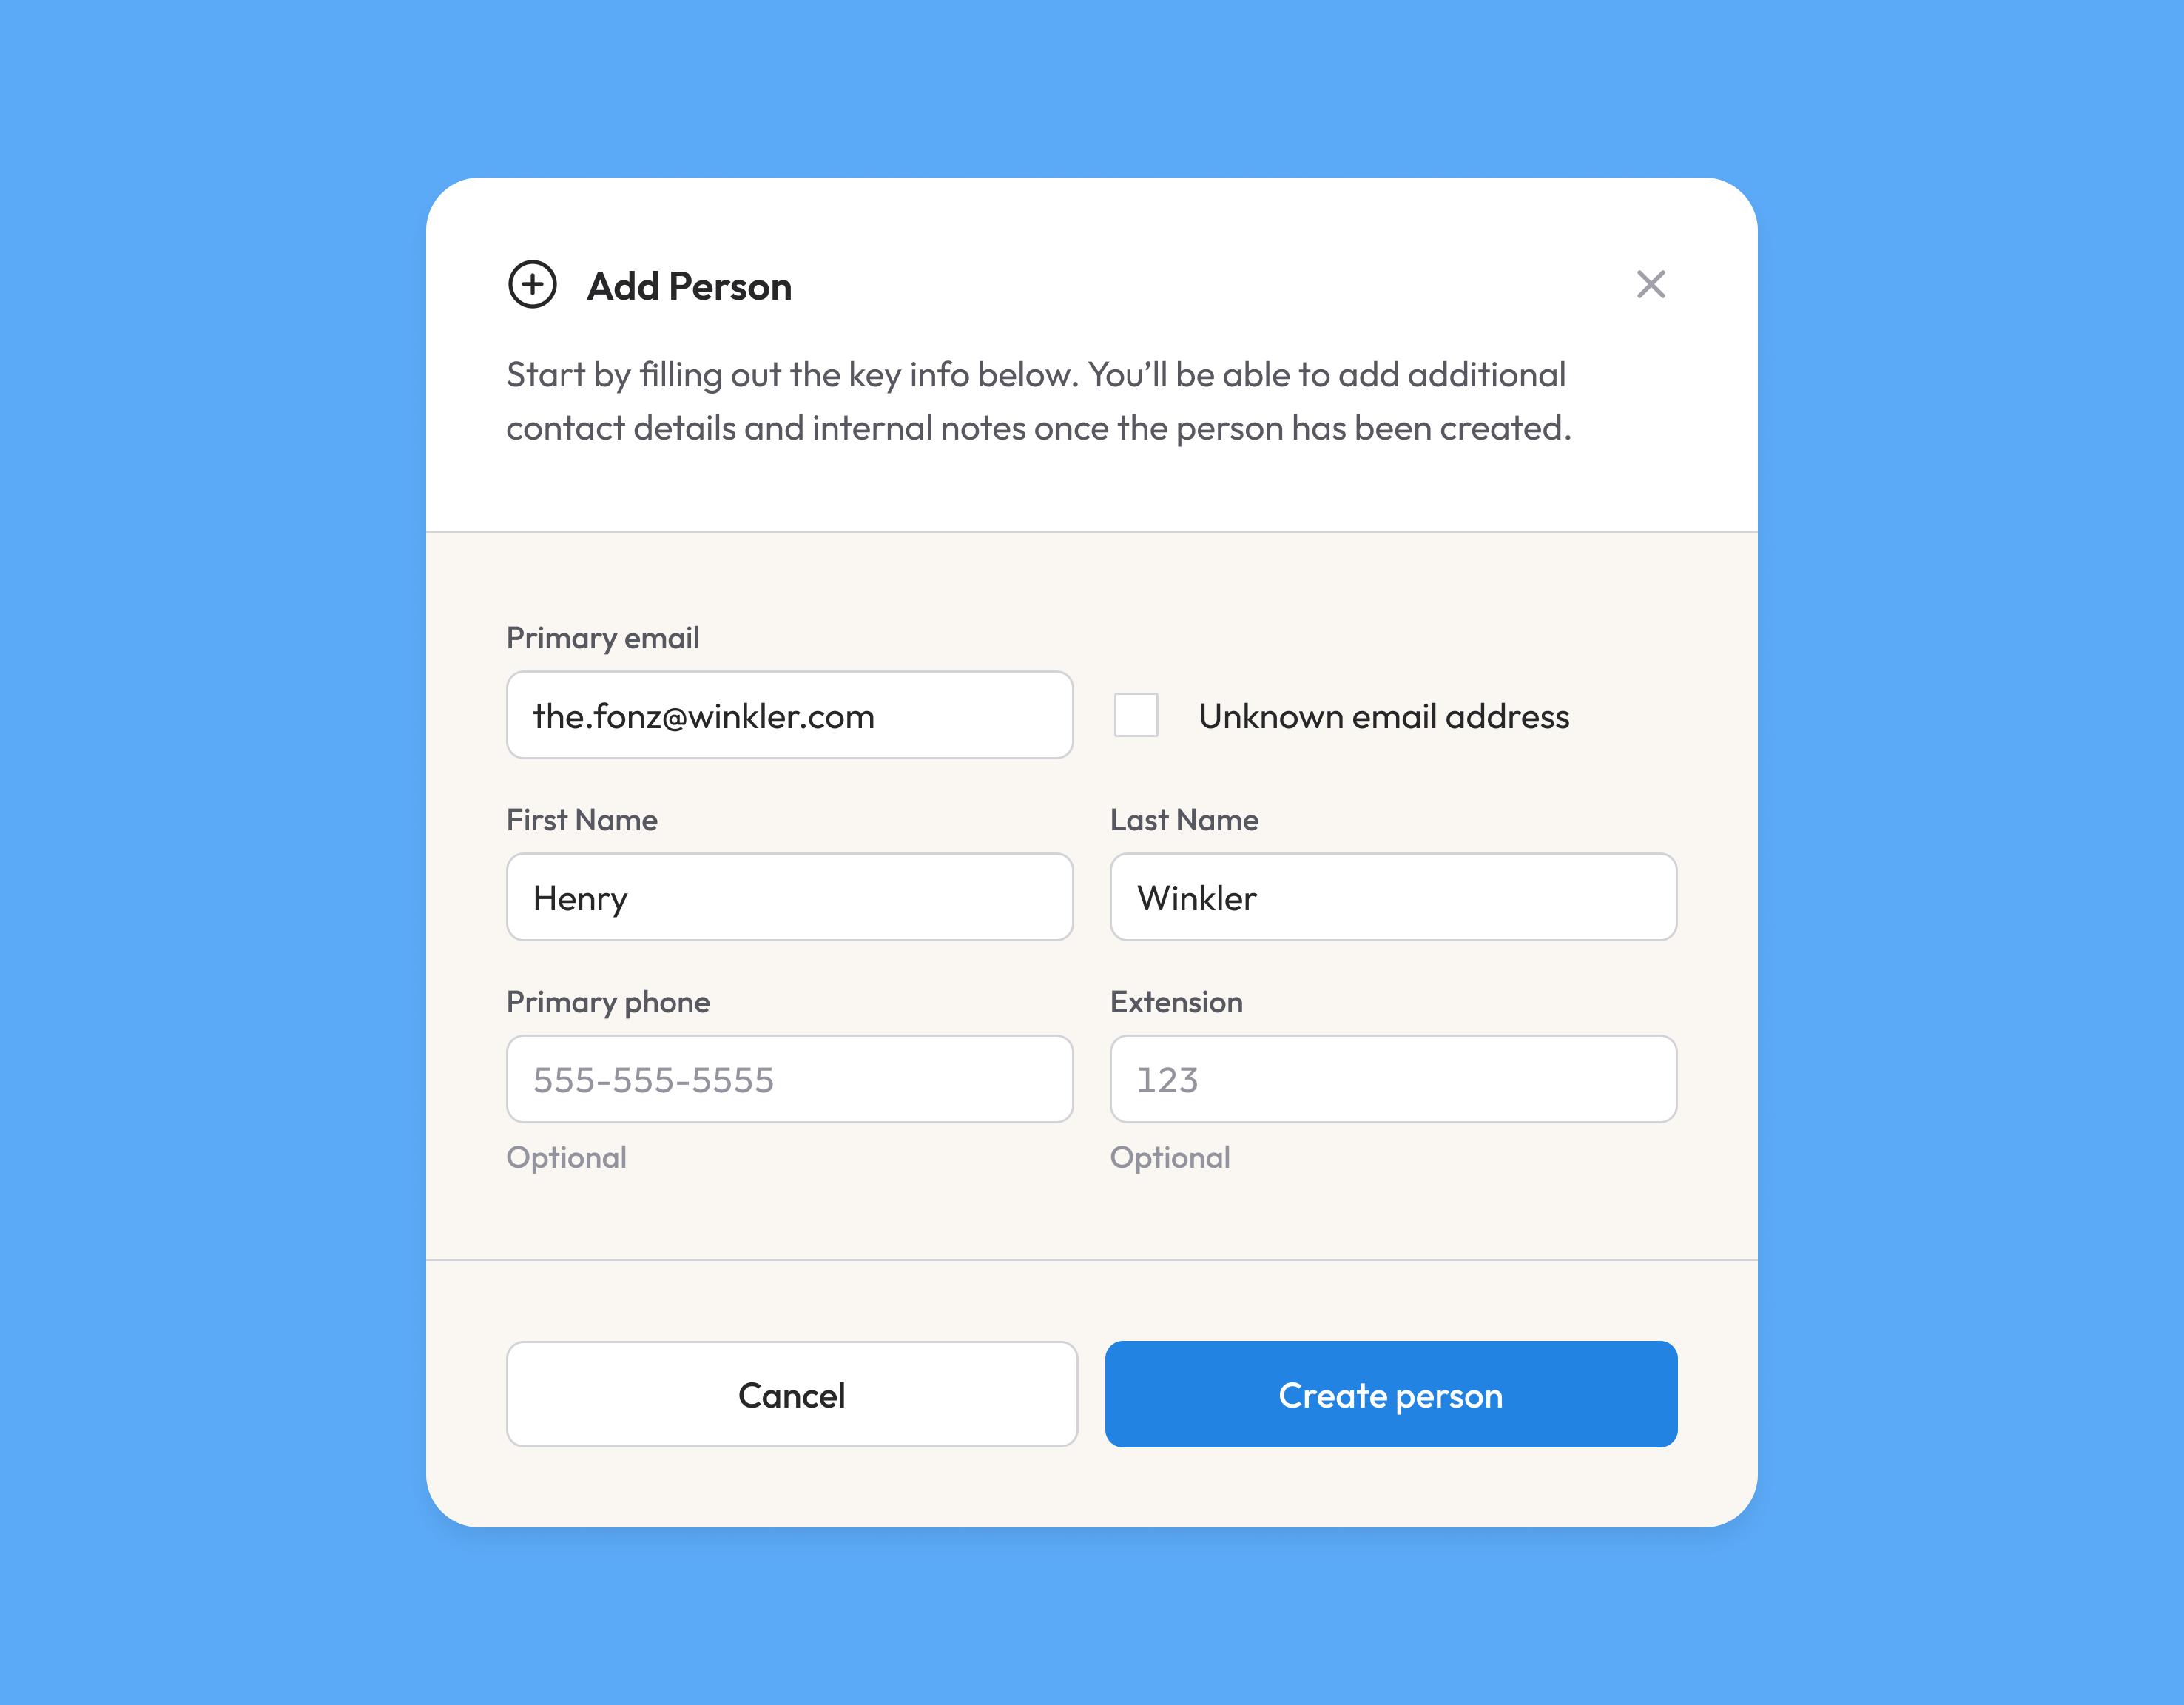
If you have an email for this person, enter it first; we'll run a check to see if that person already has an existing profile in Whereabouts and, if yes, automatically pull in the remainder of their info. If you don't have an email, simply check the "Unknown email address" option and then manually enter the person's info.
The Person Panel
If you click on any person's card, their dedicated panel will appear on the right. Here, you can view and edit the person's contact info, see their connected listings, and access their full timeline.
This Person Panel is a whole subject just on its own — check out the dedicated article for more details!
Tagging People
In the left menu, you'll see all of the tags available in your People app. Multiple tags can be applied to any given person.
Default Tags
The first few tags in the list are system defaults that are applied automatically based on a person's role/status within your account; they can not be applied manually.
- Customer: If you have a connected Storefront with purchasable products, anyone who makes a purchase will have the
customertag applied. - Lead: If you have connected a form on your website to the People app, anyone who makes a submission will be captured in your People app and will have the
leadtag applied. For more information on capturing leads, please see the Leads documentation. - User - Operator: Any person who is connected to a listing in your account will have the
user-operatortag applied.
Custom Tags
You can, however, create as many additional custom tags as you need. To do so, click on the Manage Tags button above the tag search field.
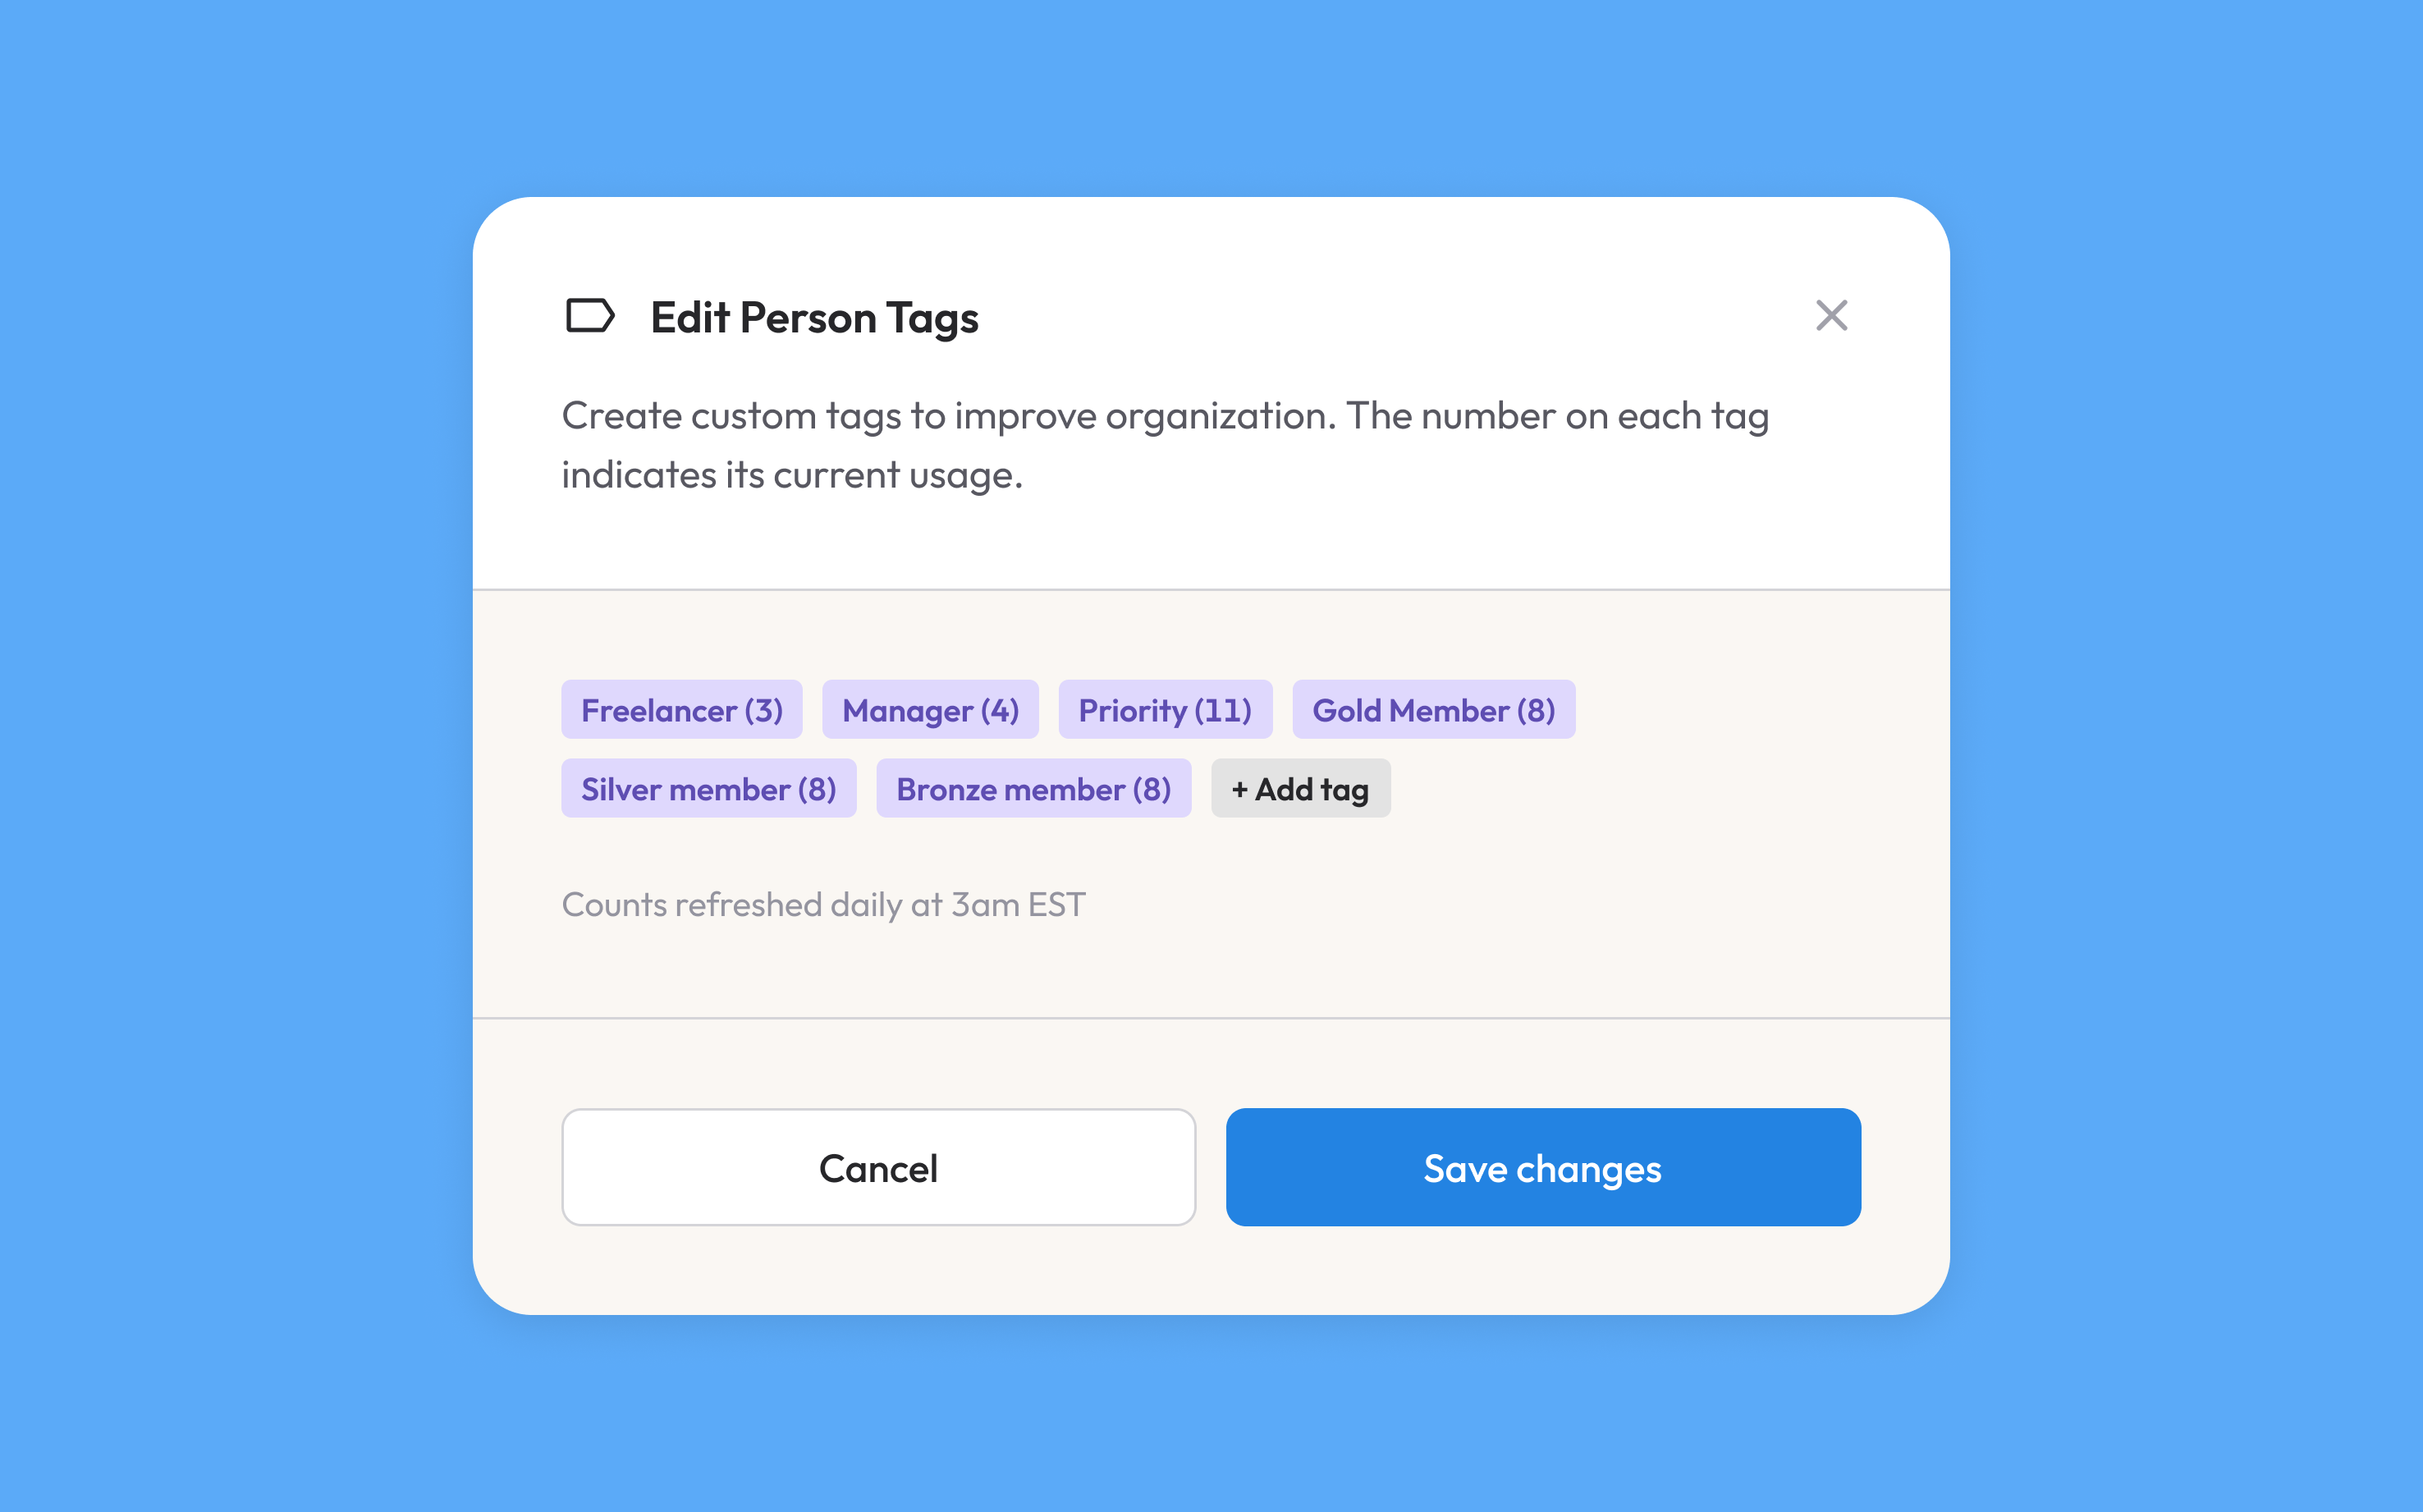
In the Edit Person Tags modal, you'll see the full list of your current custom tags and, at the end of the list, a button to create a new one. On each tag is displayed its total usage count.
Managing Tags
If you click on any custom tag, the Tag Details panel will open on the right-hand side. Here, you can edit the tag's name and see all of its instances.
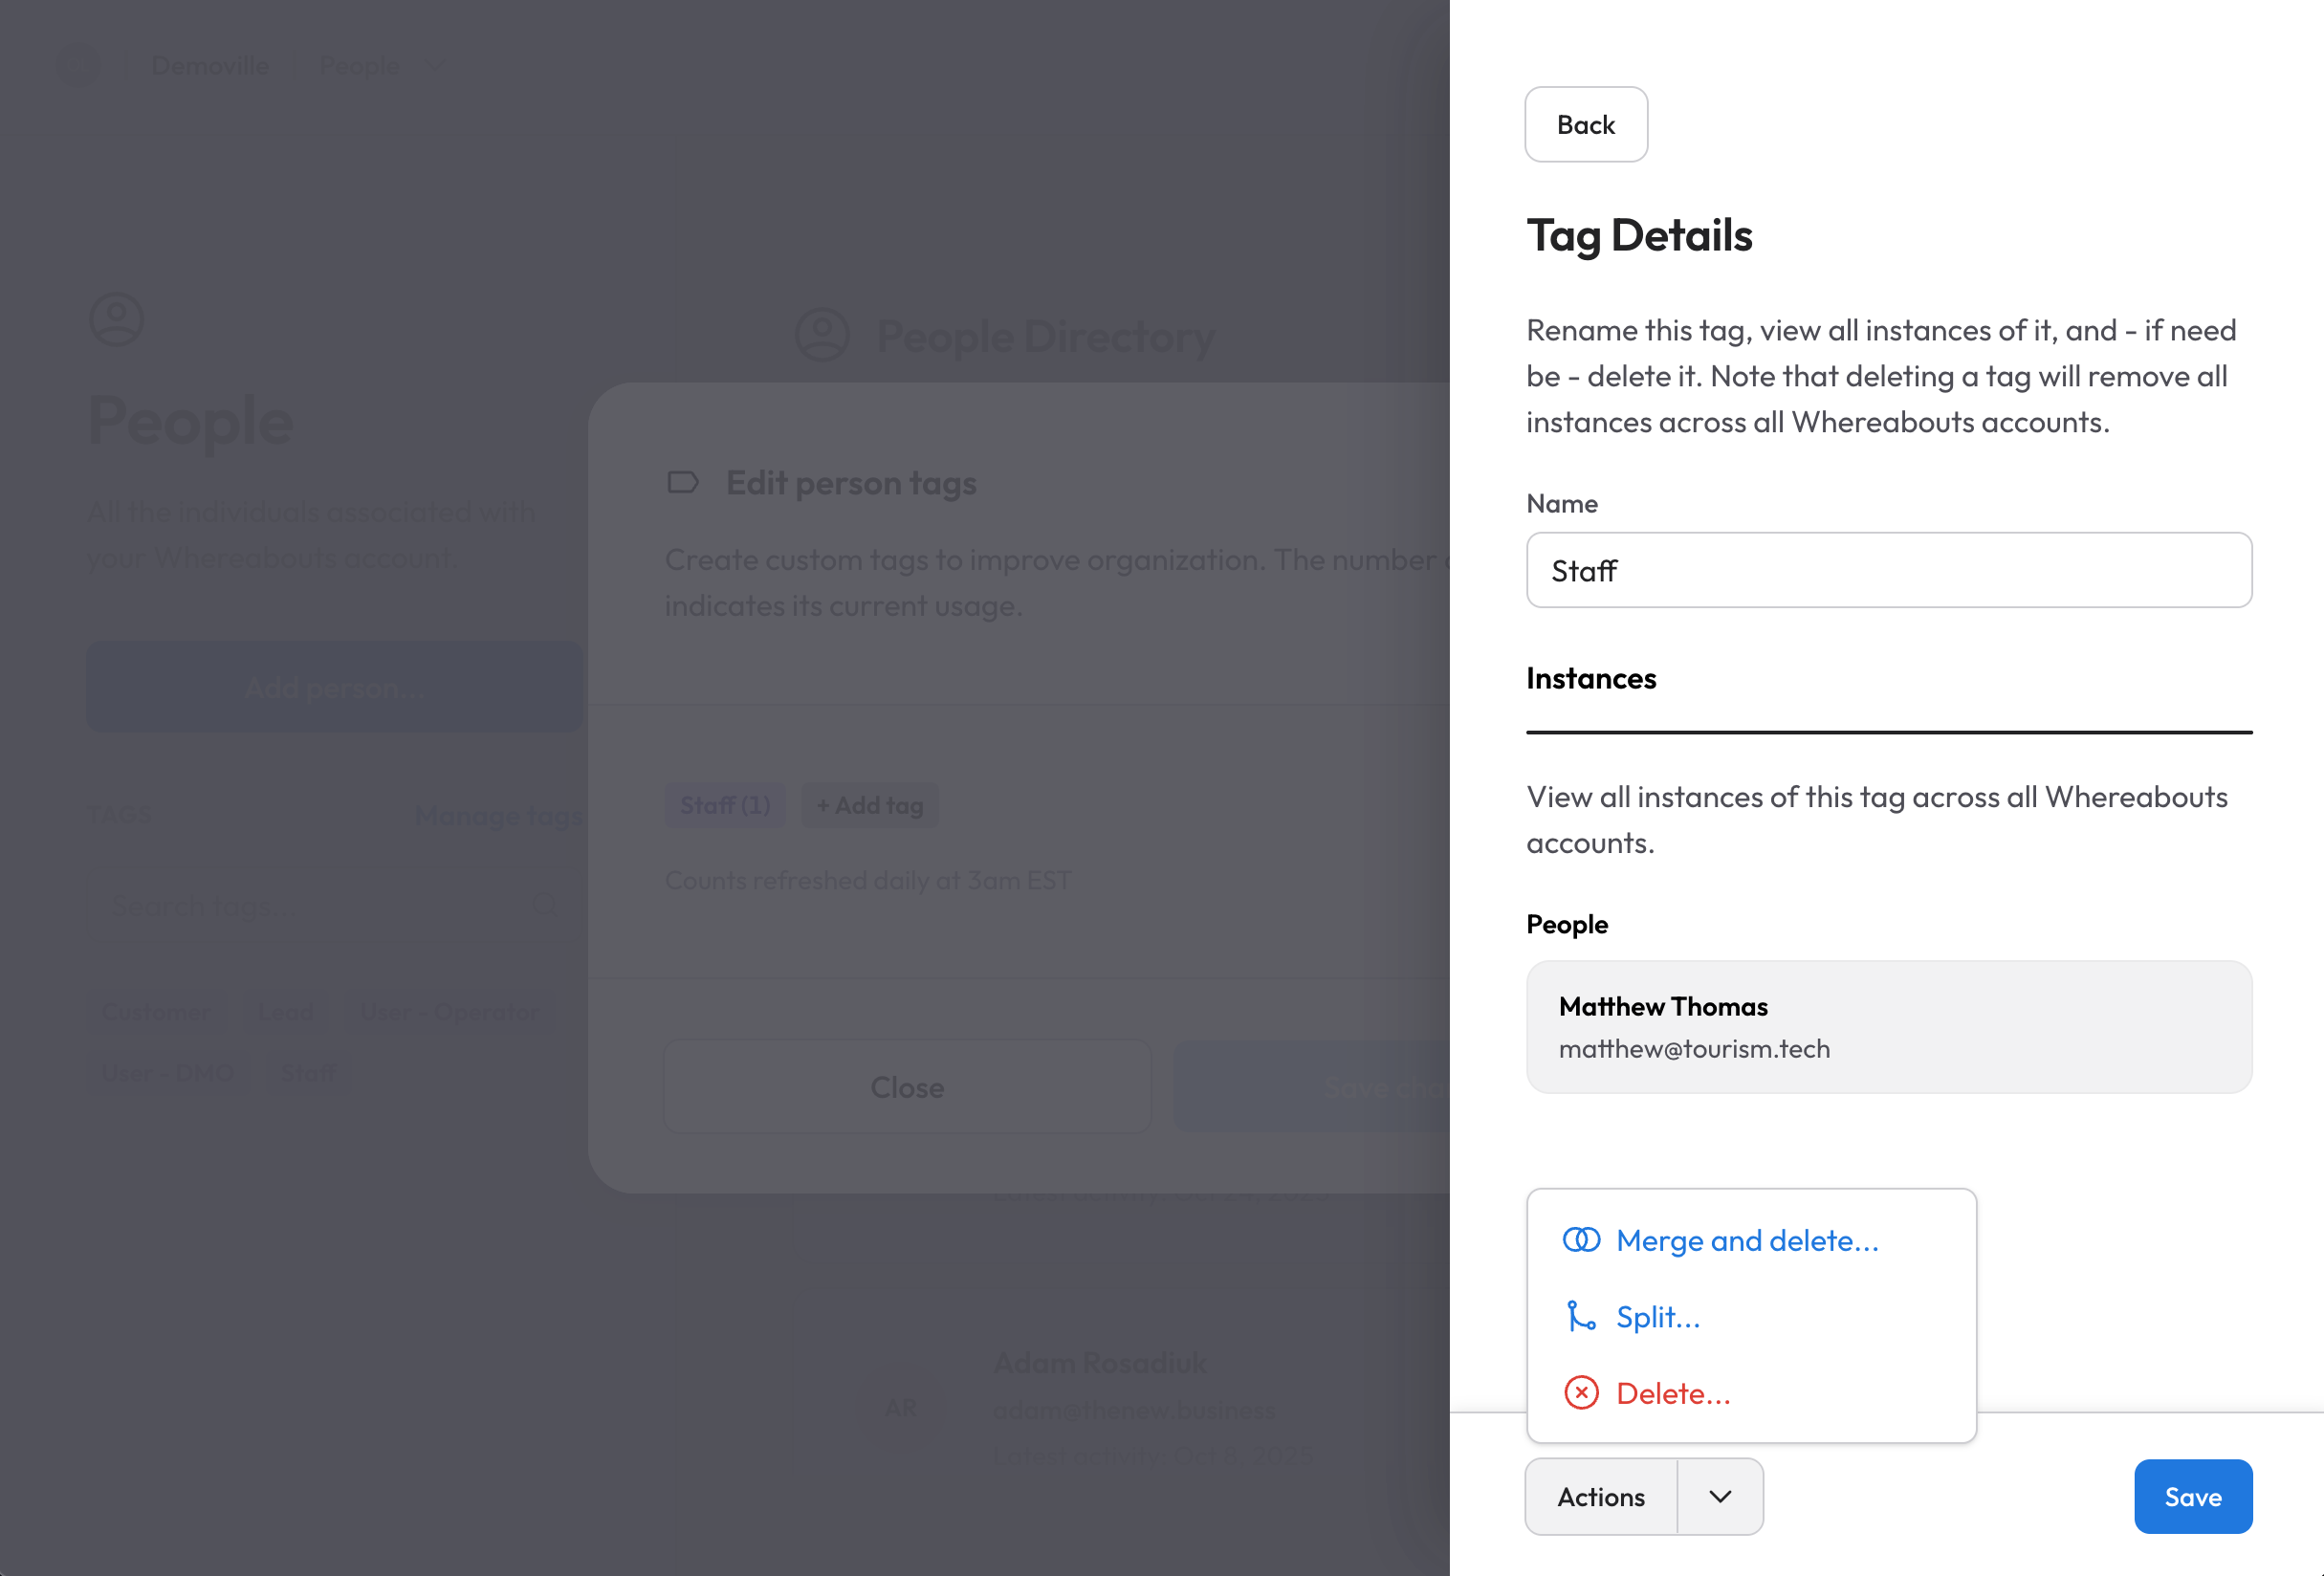
Clicking the Actions button at the bottom of the panel reveals a few additional options for the tag. From here, you can:
- Merge the current tag into another one
- Split the current tag into multiple tags
- Delete the current tag
When either merging or splitting a tag, you don't have to worry about re-tagging anything; we'll apply the changes automatically.
If you've made any changes to a tag, don't forget to Save them in the bottom menu.
Note! If you plan on publishing and sharing Broadcasts with specific segments of people, you'll first need to create those segments through the application of custom tags here in the People app. For more info, please see the dedicated Broadcast documentation.
Sorting & Filtering
Next to the search bar, you'll find...
- An option to sort the People list by either latest activity or alphabetically by name.
- A button to create an advanced filter
Advanced Filtering
Clicking the Create Filter button will open an inline query builder; here, you can create any number of rules to filter the people list below. To start, click Add Rule :
[ss]
Next to the Add Rule button is a selector to choose whether you want your rules to follow an AND condition (e.g. results must match all of my rules) or an OR condition (e.g. results must match any of my rules).
The following properties are available when creating rules:
- First name
- Last name
- Tags
- Inquiry text (for leads)
- Scratchpad text (see the Person Panel article for more details)
- Primary title
- Birthday
- State/Province
- Country
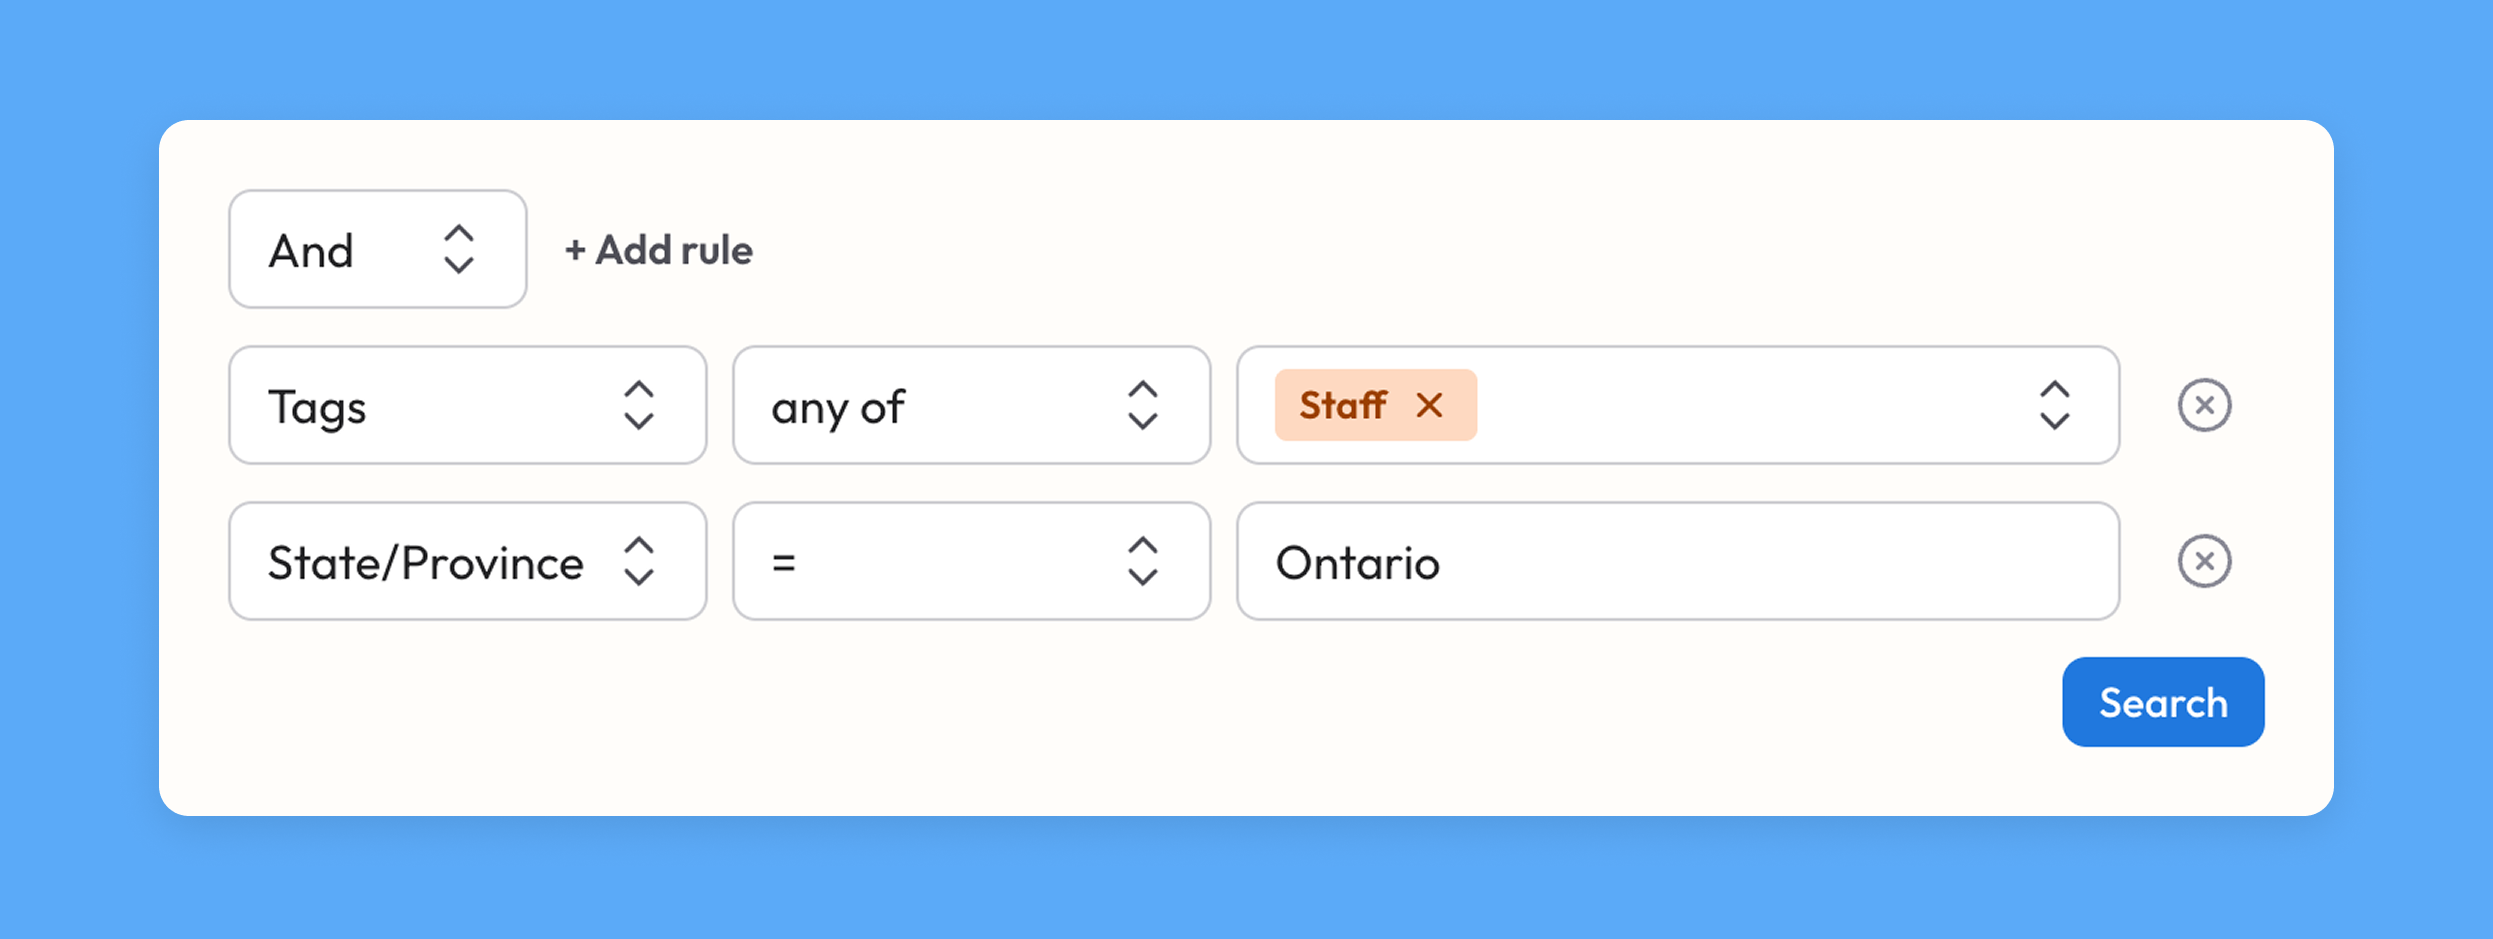
So, for example, if I wanted to find people who have a specific custom tag applied and are based in Ontario, my filter would look like this:
Exporting to CSV
You can export people data using the Export to CSV option. Note that the exported data will mirror whatever filter conditions you currently have in place. If no filter is present, we'll export the full list of people.